| Back to the 5050 online resource | Olympus 5050 user group |
1. Order part from Olympus (631)-881-6500 option 3. Cost $34.20 + $5 s&h as of October 2004.
2. Gather a few tools. I bought a precision Phillips head size #00 from a hardware store for about $6. Used a nice pair of tweezers to help with the ribbon connections, and a knife blade to remove the hotshoe spring.
3. Draw diagram and label screw locations. The screws are almost all different. I used a loop of tape to stick the screws to a piece of paper.

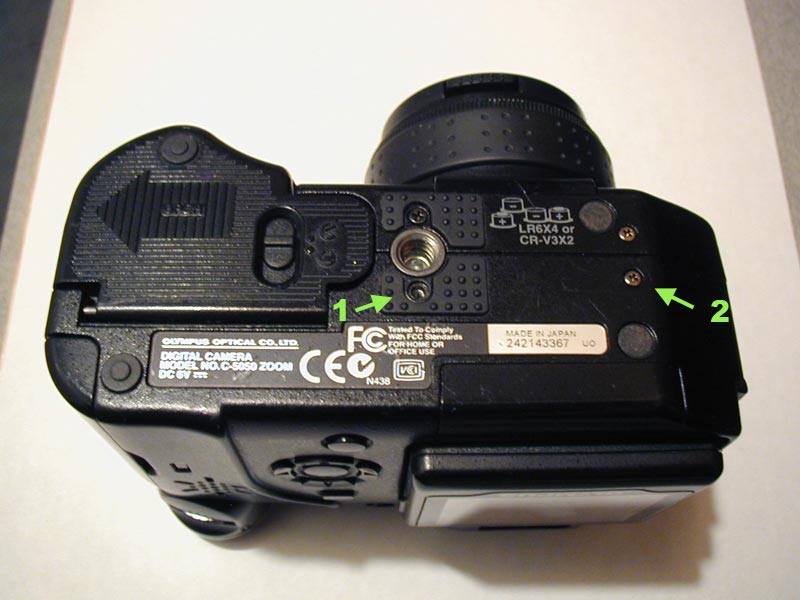
4. Remove Screw 1 and 2 from the camera bottom. Only remove the screws from one half of the camera. If you remove the other ones, a small rectangular brace will fall into the camera.
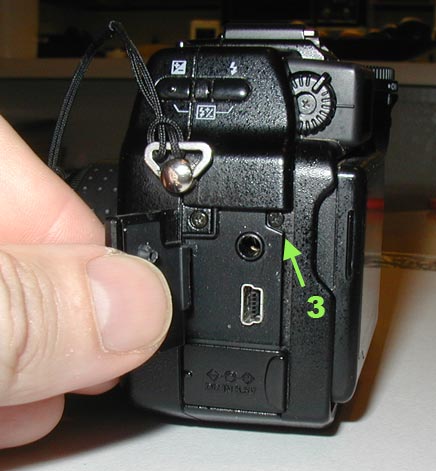
5. Remove Screw 3 from the under the USB port cover on the camera side.
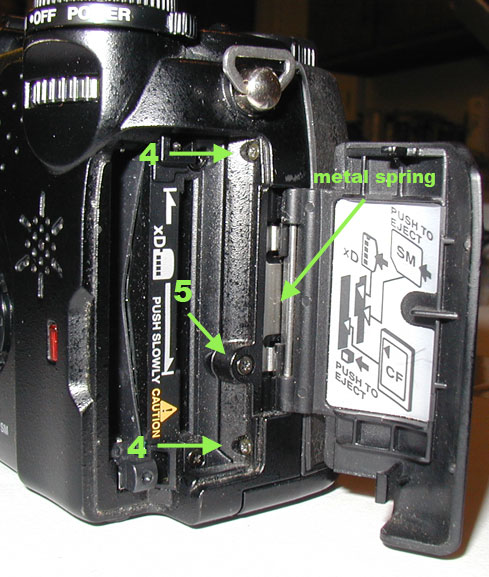
6. Remove Screws 4 (2) from other side, and then Screw 5. The door will slide out when the back is removed. Note the position of the metal spring, as it might fall off the camera as well.
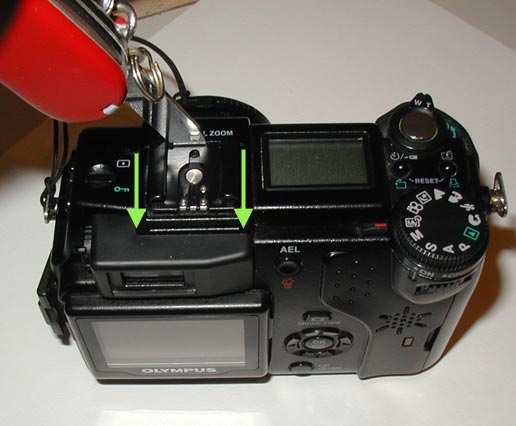
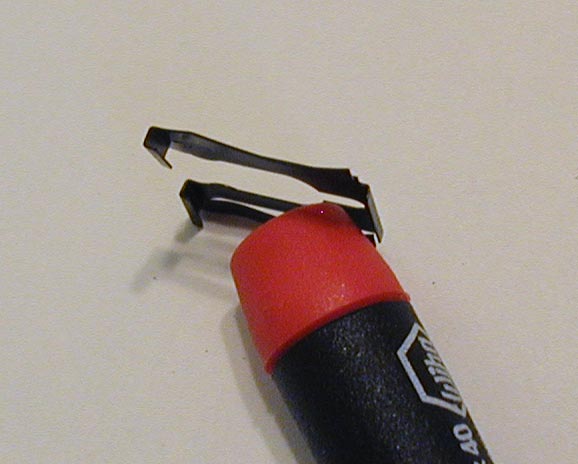
7. The trickiest part (for me anyway). Take off the plastic hotshoe
cover.
You must remove the black hotshoe spring to uncover four screws. Use a
thin
blade to slide the front edge backwards.
Comment by Soren ONeill: To remove the hotshoe spring, you need to lift
the front end of the spring whilst simultanously pushing it backwards.
When re-inserting, you need to press the back end down whilst
simultanously sliding it forward.

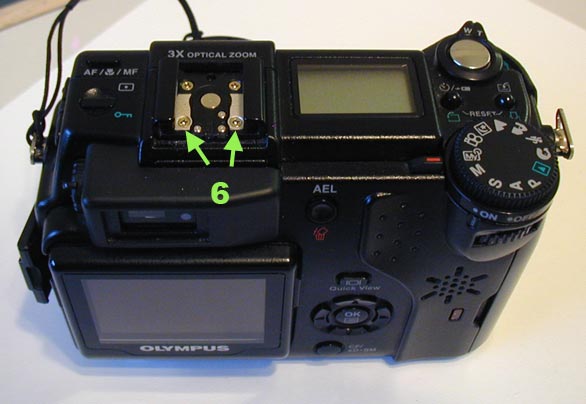
8. Remove Screws 6 (2) from under the hotshoe spring. Only remove the two on the back half of the camera.
9. You can now carefully remove the back panel of the camera. There will still be ribbon connections keeping the two connected, so don't use strong force to separate.
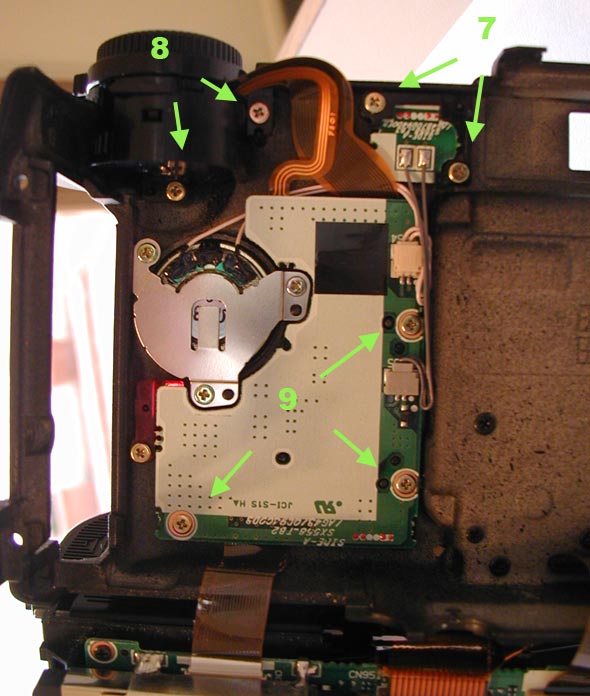
10. Remove Screws 7 (2) holding the delete button, Screws 8 (2) holding the mode dial assembly and Screws 9 (3, over the copper colored rings) holding the circuit board. Unattaching the circuit board aids in inserting the ribbon connectors when installing the new mode dial.
11. The unassembled camera should look something like this. By balancing the main body of the camera on one end with the lens against the table allowed me to replace the mode dial without removing two additional ribbon connectors between the back panel and main body.
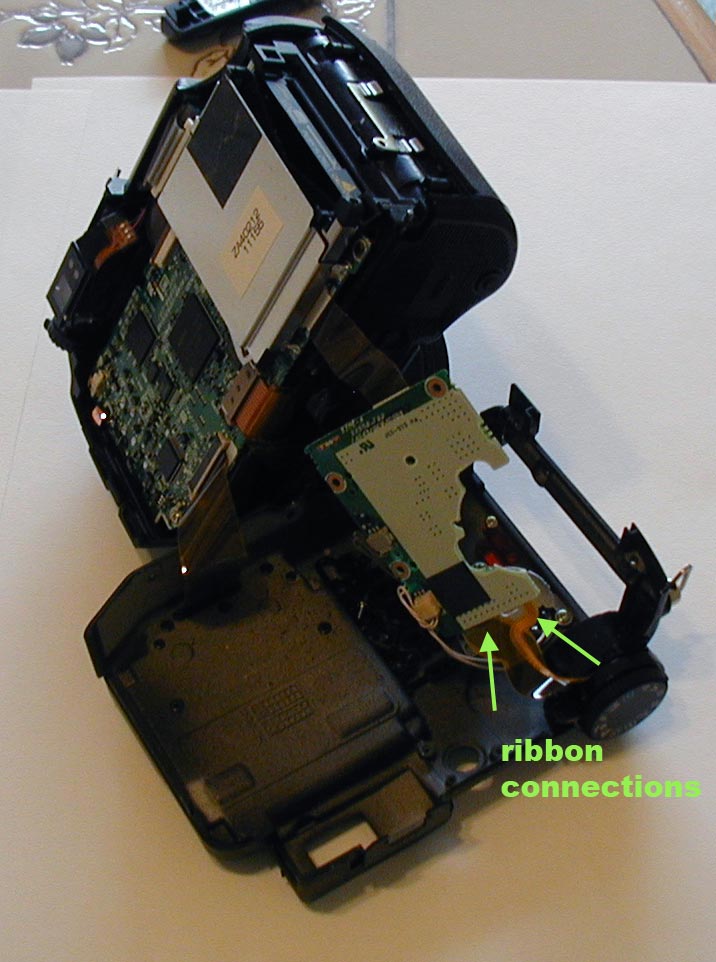
12. Carefully pull out the two ribbon cables and remove the broken mode dial. Reassemble the camera by retracing these steps. I was able to push in the wider ribbon cable with my fingers, and used a tweezer to push the narrow one.
When closing the two halves together, I had to push the mode dial
ribbon
cable down a bit using the screwdriver to prevent pinching it.
If during dis-assembly, the metal spring and the hinged door to the
memory card department becomes unhinged during dis-assembly, you need
to re-insert the spring and door prior to closing the two halves of the
camera again.
All in all, this was a pretty straight forward repair job. I
estimate it took
about 90 minutes to complete, but I would set aside an afternoon in
case
problems arise. Best of luck.
Copyright 2004 Steve Newcomb - Oly Camera Enthusiast